A new website should bring in more business, not less. Yet many redesigns lose a large share of their Google traffic in the weeks after launch, usually because of steps that were skipped rather than anything wrong with the new design.
This is the checklist we use on every website redesign without losing rankings. It is split into four stages: before you redesign, while you build, launch day and after launch. Work through it in order and keep notes as you go.
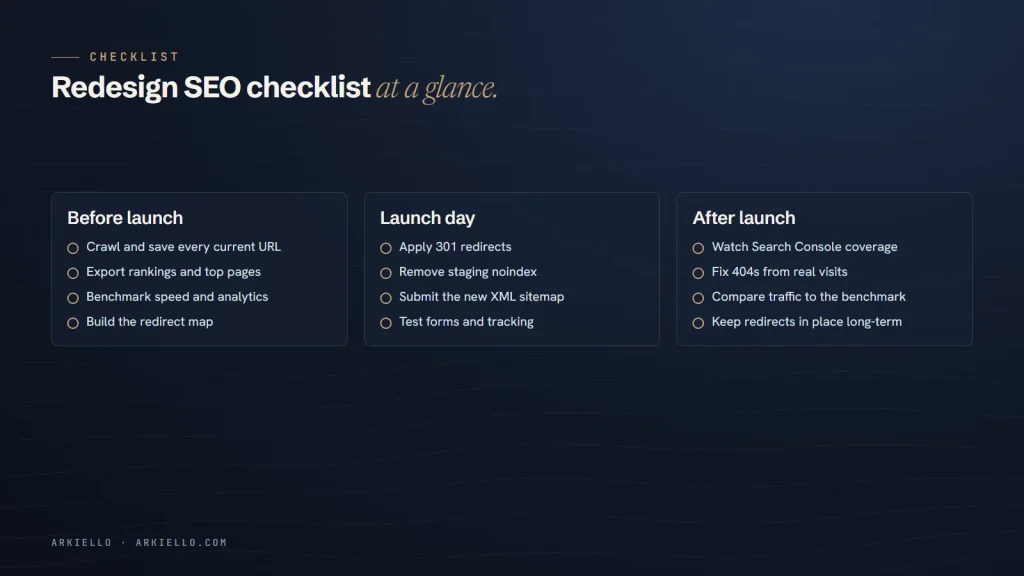
Before you redesign
1. Crawl and save every URL on your current site
You cannot protect pages you do not know exist. Build a complete list of your current URLs from three sources: a crawler such as Screaming Frog (free for up to 500 URLs), your XML sitemap, and the Pages report in Google Search Console. Add any landing pages from your analytics that the crawl missed, such as old campaign pages that are no longer linked.
Save this list in a spreadsheet. It becomes the first column of your redirect map.
2. Record which pages earn traffic and links
In Google Search Console, export the Performance report for the last 12 to 16 months, by page and by query. Note your top landing pages, the queries they rank for and the pages other websites link to (Search Console’s Links report shows these). These are the pages you must not lose.
3. Benchmark speed, tracking and conversions
Write down how the current site performs today: Core Web Vitals from Search Console or PageSpeed Insights, monthly organic traffic, and how many form submissions, calls or bookings come from the website. Without a benchmark, you cannot tell after launch whether the redesign helped or hurt.
4. Decide what happens to every page
Go through your URL list and mark each page: keep, improve, merge or retire. A page with traffic or links should never simply disappear. If you merge or retire it, decide where its visitors should go instead.
5. Build the redirect map
For every URL that will change, choose its best new equivalent and plan a permanent 301 redirect. This is the single most important step in the whole process. We cover it in detail in our guide to 301 redirects after a website redesign.
While you build
6. Keep the staging site private
Build the new site on a private staging copy protected by a password, or at least a “noindex” setting. If Google indexes the staging site, it can compete with your live site. Write down every setting you used to hide it, because each one must be reversed at launch.
7. Carry over the on-page SEO deliberately
Rankings are tied to what each page says. For every page you keep, carry over or improve its title tag, meta description, main heading, important body content, image alt text, internal links and any structured data. Shorter, prettier copy that drops the topics a page ranked for is a common cause of lost traffic.
8. Protect speed and mobile usability
Set a performance budget before design starts and check it during the build. Use modern image formats such as WebP, size images for the space they fill, and avoid heavy sliders and unnecessary scripts. Test on a real phone over mobile data, not only on a fast office connection. Google explains the thresholds it uses in its Core Web Vitals documentation.
Launch day
9. Apply the 301 redirects and test them
Put the redirects live at the same moment as the new site. Then test a sample, starting with your most valuable URLs: each old URL should return a single 301 redirect to the right new page, which then loads normally. Watch for redirect chains (one redirect leading to another) and temporary 302 redirects where you meant permanent ones.
10. Remove staging blocks and submit the new sitemap
Remove any “noindex” tags, password protection and robots.txt rules left over from staging. Check a few page sources to confirm. Then submit the new XML sitemap in Google Search Console. If you also moved to a new domain, Google provides a Change of Address tool for that; it is not needed when only the design changes.
11. Test forms, tracking and key journeys
Submit every form, click every phone and email link, and make a test booking or purchase if your site takes them. Confirm that analytics and conversion tracking record each one. A redesign that looks perfect but silently stops sending enquiries is the most expensive kind of failure.
After launch
12. Monitor, fix and keep the redirects
For the next four to eight weeks, check Search Console regularly: the Pages report for indexing problems, 404 errors from real visitors and links, and the Performance report against your benchmark. Fix missing redirects as they appear. Keep your redirects in place long-term; Google recommends keeping them for at least a year, and longer is better.
What to expect in the weeks after launch
Some movement in rankings is normal while Google recrawls the new site and processes the redirects. With the steps above in place, that movement is usually short-lived. A large, lasting drop almost always points back to one of the steps above, most often missing redirects or lost content, which is why we check those first.
Planning a redesign?
We run this checklist on every project. See how our website redesign process protects your rankings, or get a free redesign risk check.
Still deciding whether you need a redesign at all? Start with 7 signs it’s time to redesign your website.